Greenhouse Fertigation System Design Guide: Feeding Your Crop Through the Water
Most growers already feed their plants through the irrigation line. Far fewer have ever sat down and designed that system properly. And that is usually where the trouble starts — blocked drippers, one row doing better than the next, or fruit quality that slips in the hottest weeks of summer.
The good news is that fertigation done well pays for itself. In a review of many drip fertigation trials, growers who fed through drip lines instead of flooding the field and spreading fertilizer by hand produced about 12% more crop, got about 26% more out of every drop of water, and used their nitrogen about a third more efficiently.
This matters a great deal in Türkiye. Research by agricultural engineers at Akdeniz University in Antalya notes that Türkiye has the largest geothermally heated greenhouse area in the world, with roughly a quarter of its high-tech greenhouses heated this way, and that around 30% of the country's tomato crop is grown under cover. When you are growing at that scale, and often for export, small improvements in feeding add up fast.

What is fertigation, and why does the design matter?
Fertigation simply means dissolving fertilizer in your irrigation water so the plant gets food and water at the same time, right at the roots.
Think of it like a chain with seven links:
- Your water source
- A filter
- A pump and pressure control
- The part that adds fertilizer to the water
- A place where it mixes, and sensors that check it
- The pipes and drippers that carry it to the plants
- What drains out the bottom, which tells you how you are doing
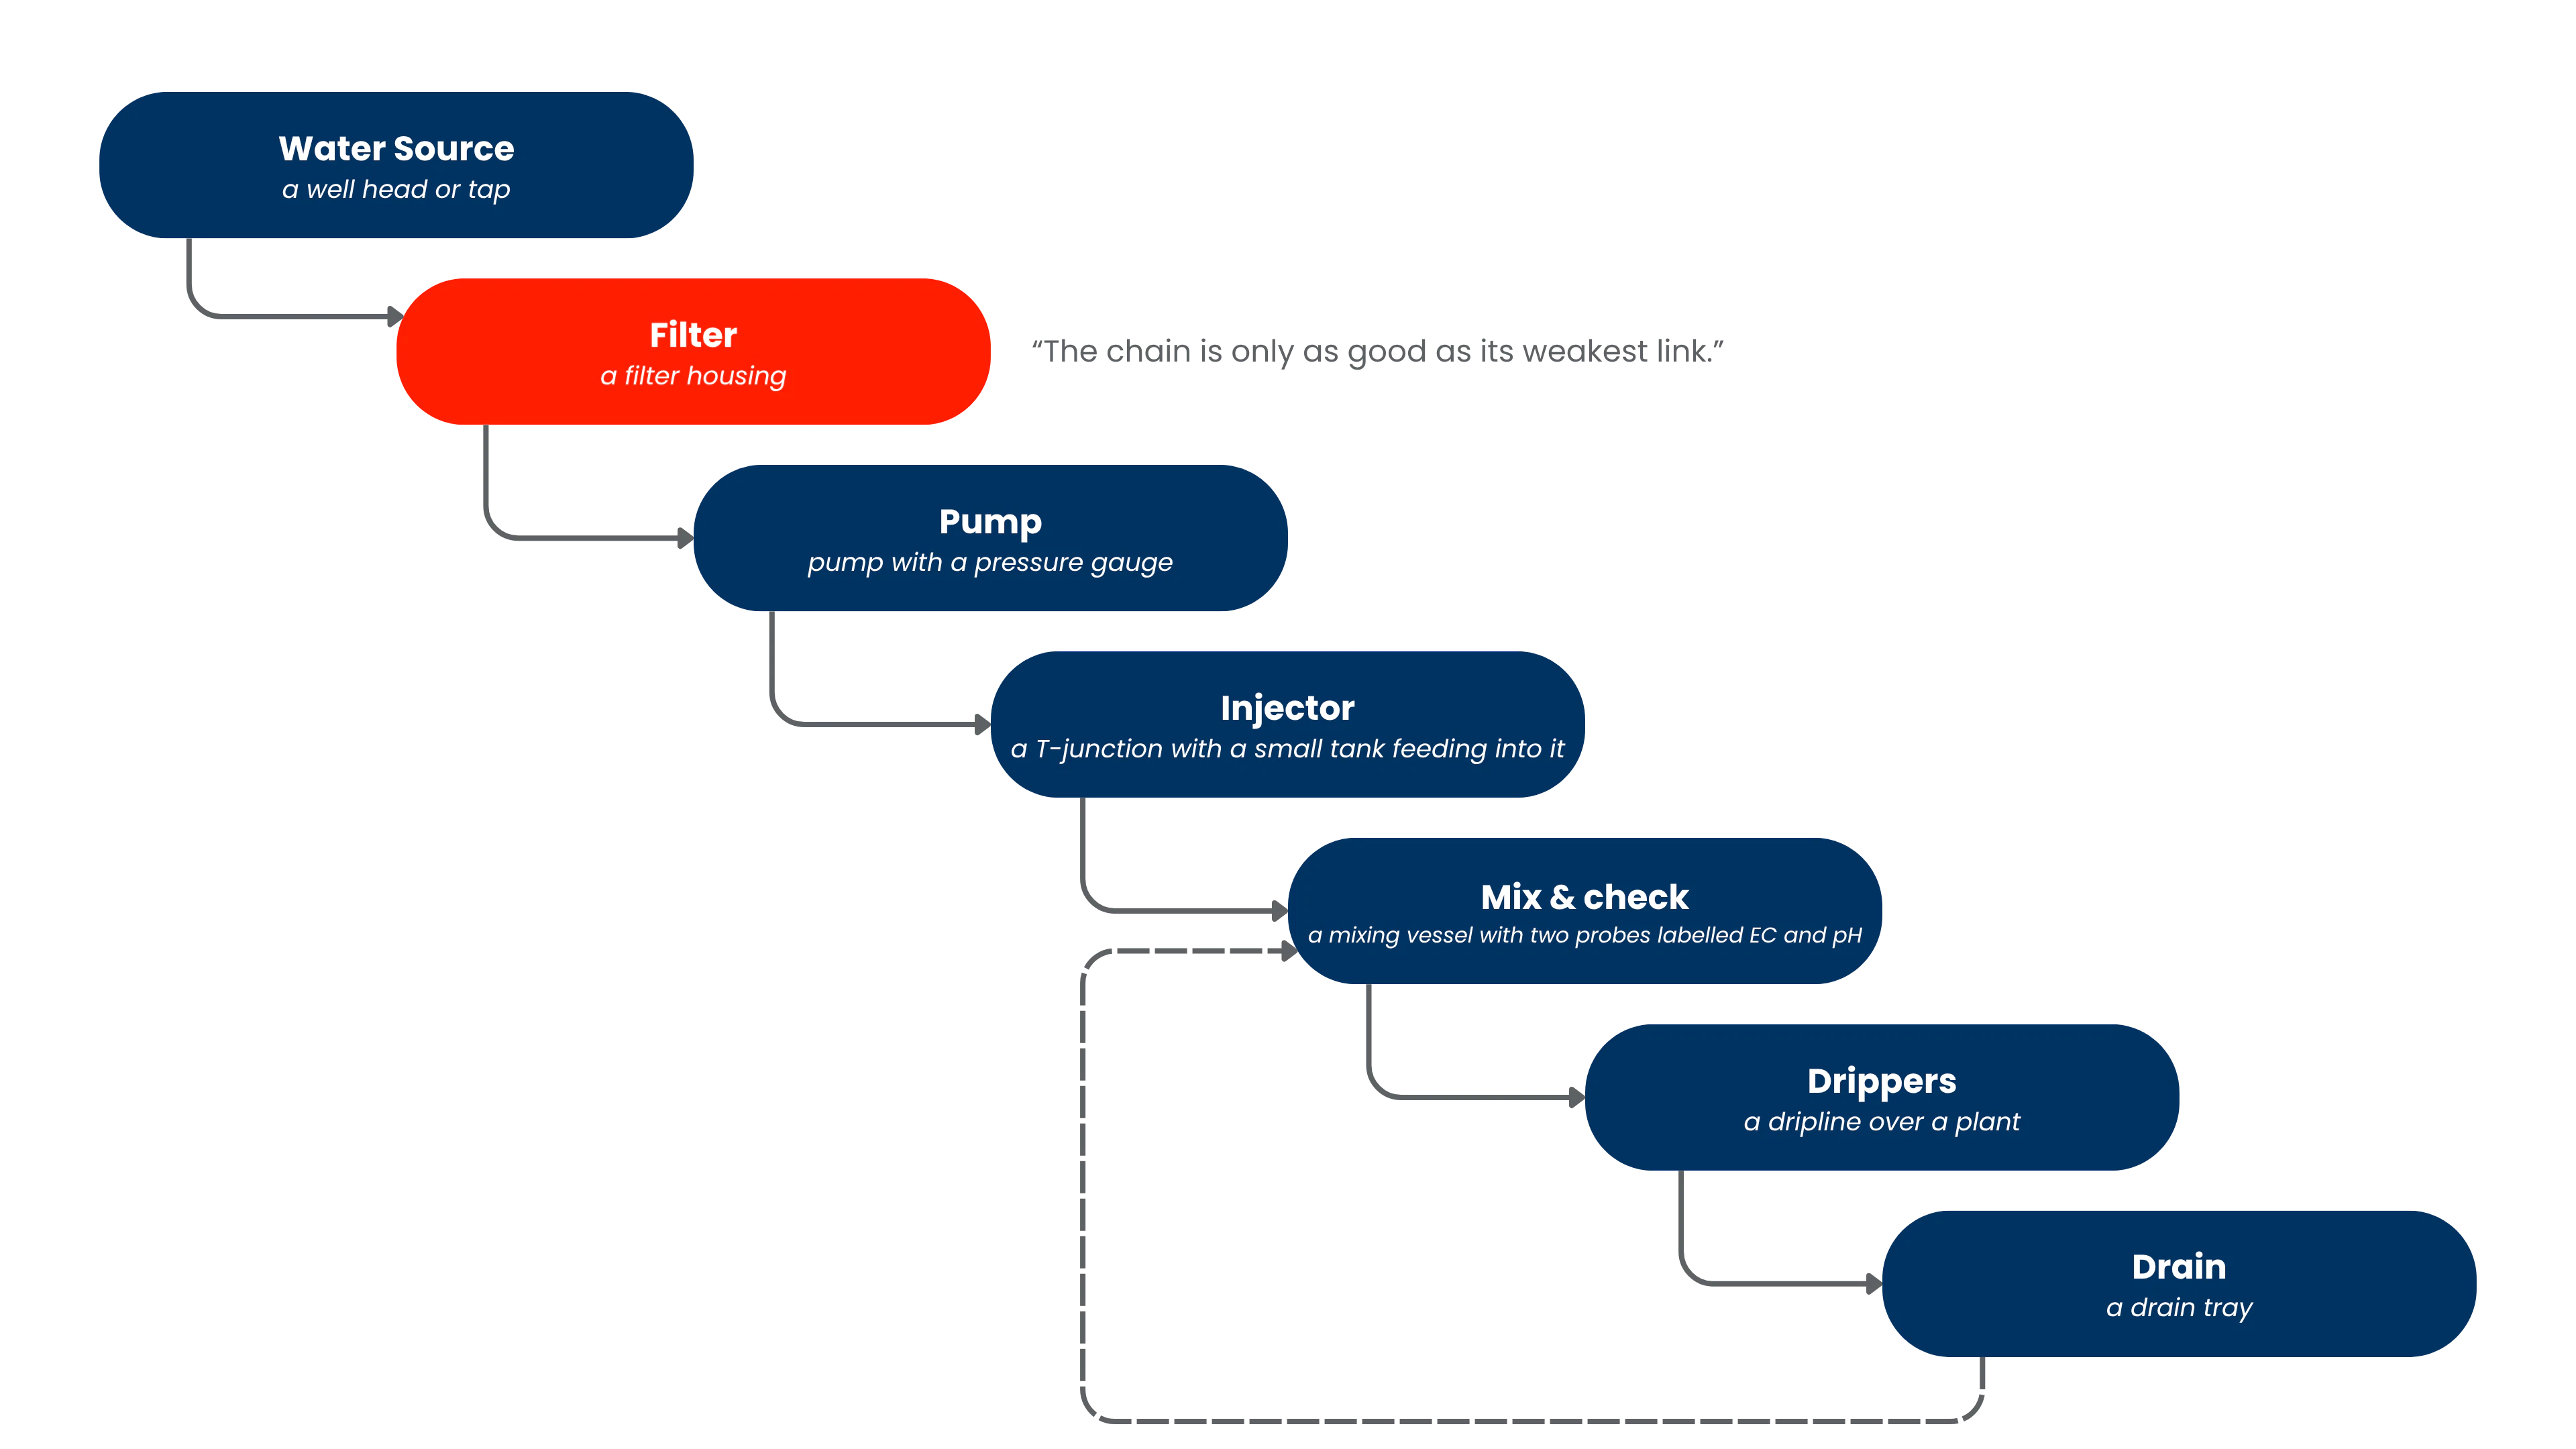
A chain breaks at its weakest link. An expensive fertilizer unit sitting behind a small, poor filter will still block your drippers. And very accurate feeding through pipes that deliver unevenly just means every row gets the wrong amount very precisely.
So design the whole line, not one piece of it.
What parts do you need in a greenhouse fertigation system?
The essential fertigation system components for a greenhouse are:
- A water test— before you buy anything. Send a sample to a lab. You want to know how salty it is, how much lime it carries, and how much sodium, chloride and iron are in it. Extension guidance puts the desirable range for irrigation water alkalinity at 0–100 ppm calcium carbonate, and Purdue Extension notes that water above roughly 120 ppm is likely to push your root-zone pH up over time, which is the point at which acid injection becomes worth considering.
- A storage tank so a slow water supply does not limit your irrigation, and so sand and silt can settle out.
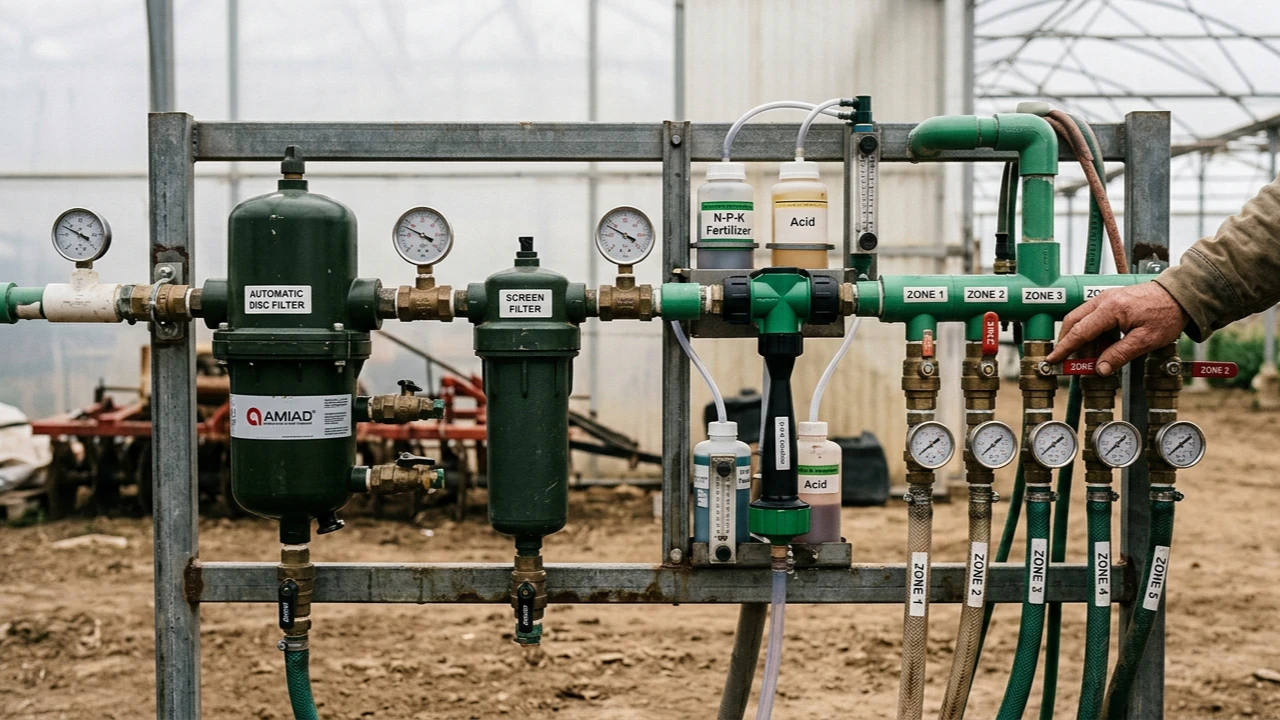
- A main filter — sand or disc type, big enough for your water quality, and able to clean itself by backflushing.
- A screen filter after it. Extension services generally recommend around a 150-mesh screen for drip systems, with 120–200 mesh covering most installations. Always check what your dripper maker asks for.
- A pump and pressure regulator sized for your biggest single block, not the whole greenhouse.
- The fertilizer injector — a venturi or a dosing pump (more on this next).
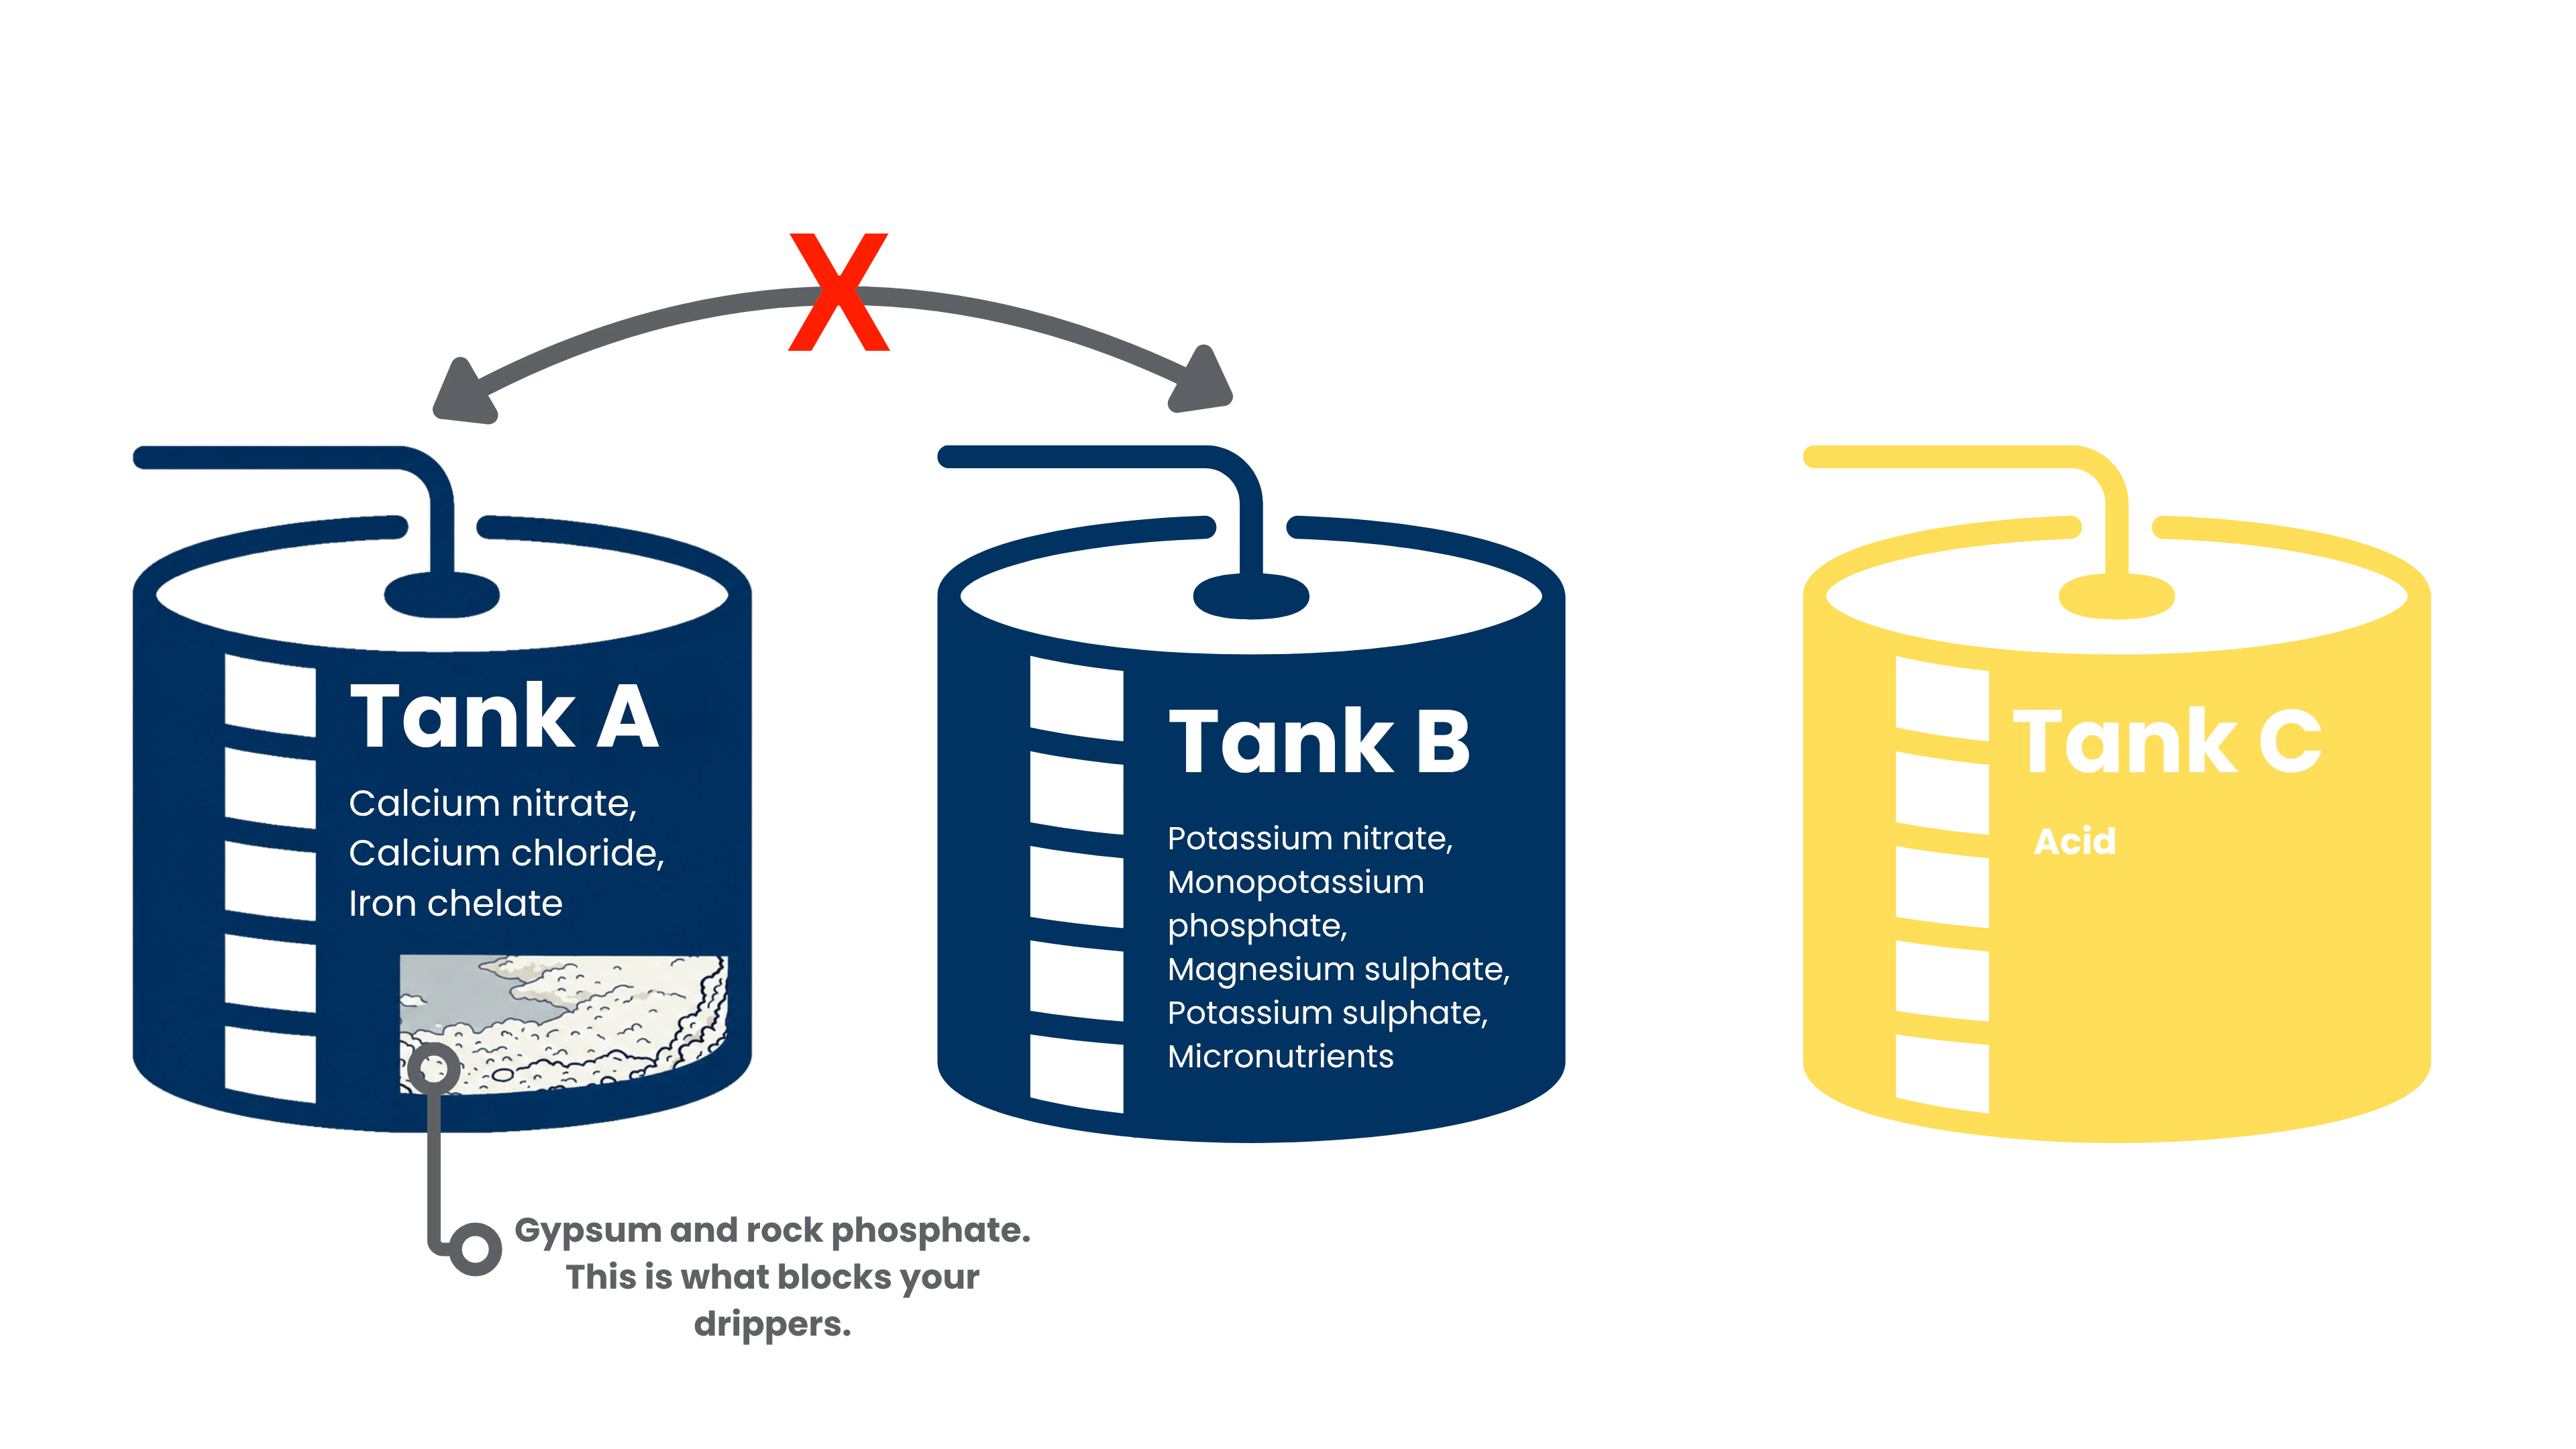
- Three tanks: Tank A, Tank B, and a separate acid tank. Dark-coloured, closed, and clearly labelled.
- A mixing chamber so the sensors read properly mixed water, not a sudden slug of concentrate. EC and pH sensors with a controller that can correct itself, not just beep at you.
- A backflow preventer so fertilizer can never run back into your water source. This is often a legal requirement.
- Flow meters and pressure gauges on each block so you can find a problem with numbers instead of guesswork.
- Pressure-compensating drippers if your rows are long or your ground slopes.
- A way to collect the drain water if you grow in coir, perlite or rockwool.
Venturi injector or dosing pump: Which one should you choose?
There are several ways to get fertilizer into the irrigation line, but most greenhouse growers are choosing between two.
A venturi injector has no moving parts. The pipe narrows at one point, the water speeds up, and that creates a suction that pulls fertilizer solution in from your tank. It is cheap, simple, needs no electricity, and is easy to fit to an existing system.
The catch: it needs a pressure drop to work, so you lose some pressure across it, and the amount it pulls in changes when your flow or pressure changes. That is why it is often installed alongside a small booster pump.
A dosing pump is a small motor- or water-driven pump that pushes in a fixed amount of fertilizer with every stroke. Because it does not rely on suction, the dose stays steady even when line pressure moves around. It costs more, has parts that wear, and usually needs power.
A simple way to decide:
| Your situation | Better choice |
| One or two blocks, same crop, tight budget | Venturi (with a booster pump) |
| Several blocks needing different recipes | Dosing pump |
| You want automatic EC and pH correction | Dosing pump |
| Power supply is unreliable or unavailable | Venturi |
| Growing in coir, perlite or rockwool | Dosing pump |
| Adding to an existing system with no power nearby | Venturi |
Plenty of modern units combine the two. A venturi with a booster pump and electronic controls, which gets you most of the accuracy for less money.
Whichever you choose, calibrate it. Extension guidance for greenhouse crops stresses checking the actual delivered concentration with an EC meter rather than trusting the ratio printed on the unit.
How do you set a fertigation schedule for greenhouse vegetables?
A good fertigation schedule for greenhouse vegetables follows the crop, not the clock. Three things change together: how often you water, how much you give each time, and how strong the feed is.
How often. In coir or rockwool, little and often works best; several short waterings through the day, triggered by sunlight levels or by how dry the substrate has become. In soil, fewer and larger waterings suit better, because the soil holds moisture for you.
How much. When you water matters as much as how much. In a two-year tomato trial in coir, growers who waited until the substrate dried to 70% before feeding got 29% more out of their irrigation water than those feeding at 80% and lost only about 3.6% of yield — with better-tasting fruit1.
How strong. Young plants need a weaker feed than fruiting plants. For greenhouse tomato, a common approach is about 2.0 EC early on, rising to around 2.4 EC in full production.
 Feed strength overall: about 2.0 EC at Stage 1, about 2.4 EC at Stage 3Stage 1 — from cotyledon emergence to the second truss with open flowers
Stage 2 — from the third truss to the fifth truss with open flowers
Stage 3 — beyond the fifth truss with open flowers
A simple season plan looks like this:
- Planting out: weak feed, water less often, allow plenty of drain
- Growing on: medium feed, water more often as the days get brighter
- First fruit set: raise nitrogen, calcium and potassium
- Full picking: strongest feed, most frequent watering, check drain daily
- End of crop: ease the feed back down
Then let the numbers guide you. Write down your feed EC, your drain EC and how much drains out, every day. If the drain EC keeps climbing above your feed EC, salt is building up. The answer is more water, not more fertilizer.
What EC and pH numbers should you aim for?
EC and pH control in greenhouse irrigation is where most feeding programmes are won or lost. Two simple ideas:
pH decides what the plant can actually take up. Get it wrong and the fertilizer is in the water but not in the plant. Penn State Extension found that growers who brought their feed water to pH 6.2–6.5 were able to cut potassium use considerably and still get better fruit quality2. For greenhouse tomatoes in bark or peat mixes, Mississippi State Extension recommends holding the feed at pH 5.6–5.8. The right number depends on what you are growing in, so check for your own medium.
EC tells you how much, never what. EC is really just a measure of how much salt is in the water. It cannot tell nitrate apart from sodium. Your EC can look perfect while the crop is short of calcium. So use EC for daily control, and send feed and drain samples to a lab about once a month to see the full picture.
Two more habits that cost nothing:
- Measure in three places: what goes in, what is in the root zone, and what drains out. One reading at the pump only tells you what you dosed.
- Calibrate your meters. Handhelds weekly, the sensors on the unit at least monthly. A pH probe that has drifted is worse than no probe, because it will confidently correct in the wrong direction.
If you grow along the Mediterranean coast, your water is likely hard and your soil chalky. That means acid injection is usually necessary rather than optional. And it is worth remembering that alkalinity, not the water's pH reading, is what actually drives your root-zone pH upward over a season.
How do you mix your nutrient solution safely?
Nutrient solution mixing for greenhouse irrigation comes down to one big rule and a few small ones.
The big rule: never put calcium fertilizers in the same concentrated tank as phosphates or sulphates. Concentrated solutions containing both calcium and phosphorus react and leave an insoluble, clay-like deposit in the bottom of the tank, which then travels down the line. So:
- Tank A: calcium nitrate, other nitrates, iron
- Tank B: phosphates, sulphates, magnesium, potassium
- Tank C: acid, on its own
The small rules that save systems:
- Do a jar test first. Mix a small sample slightly stronger than you plan to use, shake it, and leave it. If it goes cloudy or leaves a residue, do not put it in the tank.
- Watch the temperature. Fertilizer dissolves less easily in cold water. A tank mixed on a warm afternoon can drop solids overnight and block your drippers in the morning.
- Add one fertilizer at a time, stir until fully dissolved, then top up to the final level.
- Use micronutrients in chelated form — they stay dissolved better — and keep that tank slightly acidic.
- Use dark, closed, labelled tanks, and never use the same scoop or jug for Tank A and Tank B.
- Flush your lines regularly and check your filters on a set day each week, not after something goes wrong.
Get this right and most of your maintenance headaches simply disappear.
Where to find and compare all the options?
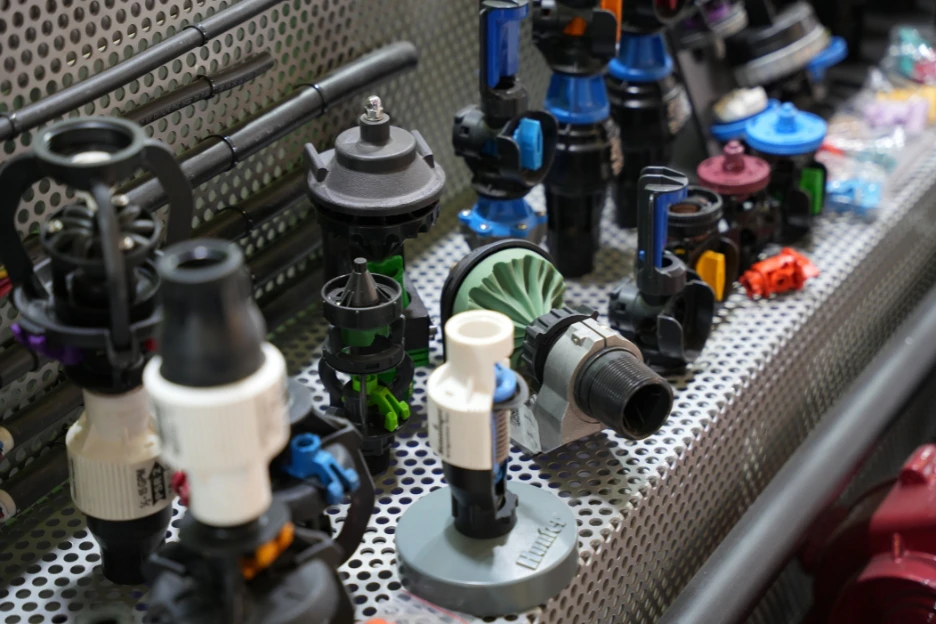
Growtech Antalya is the perfect place to find many different irrigation and fertigation products, to compare them and to discover innovations made in the field. Register your interest today to get notified about the event!
1. https://www.ncbi.nlm.nih.gov/pmc/articles/PMC10974535/
2. https://extension.psu.edu/growing-the-best-vegetables-and-small-fruit-ph-and-water-quality-matters